
Bioactive Setup
Bioactive Crested Gecko Setup: Step-by-Step Guide

Nov
How To Build A Bioactive Setup Crested Gecko Vivarium
Short answer: to set up a bioactive enclosure for a new crested gecko, use a tall, well-ventilated enclosure, build layers of drainage, a barrier, a chemical-free substrate and deep leaf litter, add safe live plants and climbing branches, and stock a clean-up crew of springtails and humidity-loving isopods. Let the enclosure run for three to six weeks before the gecko moves in, so the crew can establish. Keep the temperature in the low to mid 70s °F, mist in the evening and let the enclosure dry between mists.
A crested gecko is one of the friendliest first reptiles, and a bioactive enclosure is one of the nicest ways to keep one. A living setup looks like a small rainforest, keeps the air healthier and cuts down on cleaning. But it is easy to rush it, especially if the gecko arrives as a holiday gift. This guide walks you through the whole process, from the basics of crested gecko care to a step-by-step build, the best clean-up crew, a realistic timeline and what to do when things go wrong. This guide is general information. For your gecko’s health, ask a reptile vet and follow the care advice from a reputable breeder.
Table of Contents
Why bioactive suits crested geckos
A bioactive enclosure is a small, living ecosystem. Instead of wiping everything out and replacing it, you stock the substrate with animals that clean it up. For a crested gecko, that brings several benefits.
- It handles waste. Springtails and isopods break down droppings, uneaten food and shed skin, so spot cleaning is much easier.
- It controls mold. Crested geckos eat a wet, sugary diet, and leftover food molds quickly in a humid enclosure. A healthy crew grazes on that mold before it spreads. Our guide to why terrariums get mold explains how.
- It supports humidity. Live plants, moss and a moist substrate hold humidity more steadily than a bare enclosure.
- It looks natural. A planted enclosure gives a tree-dwelling gecko climbing routes, cover and a real sense of place.
- It enriches the gecko’s life. Foraging, climbing and hiding are natural behaviors, and a rich setup encourages them.
It does take more thought at the start than a simple paper-towel setup, which is why timing and patience matter.
Crested gecko care basics
Before you build, it helps to know what a crested gecko needs. These are widely used guidelines, and you should confirm them with a reputable care guide or a reptile vet for your animal.
Temperature
Crested geckos are comfortable at ordinary room temperatures in the low to mid 70s °F, roughly 72 to 78°F (22 to 26°C). They tolerate a slight drop at night, but sustained heat above the low 80s °F is dangerous. In a warm home, you may need to keep the enclosure cool. In a cold home, you may need gentle, thermostat-controlled heat.
Humidity
Crested geckos like humidity of roughly 60 to 80 percent, with a heavier mist in the evening and a chance for the enclosure to dry out during the day. Constant soaking is as bad as constant dryness. A hygrometer helps you check.
Water
Provide a shallow, clean water dish and mist leaves and walls so the gecko can lick droplets, which is how they often drink.
Food
Most keepers feed a commercial crested gecko diet, mixed with water into a paste, offered in a small dish. Many also offer insects occasionally. Remove old food after about a day, because it spoils fast in a humid enclosure. That is where your clean-up crew earns its keep.
Light
Crested geckos are active at night. A normal day and night cycle matters. Many keepers also provide low-output UVB lighting, which is increasingly recommended. Ask your vet or breeder what suits your setup.
Space and climbing
This is an arboreal species, so height matters more than floor space. Provide branches, vines, cork bark and plenty of foliage for cover.
Choosing the enclosure
Size
A commonly recommended minimum for a single adult is about 18 by 18 by 24 inches, and bigger is better. Juveniles can start in a smaller space, but most keepers eventually move up. In a bioactive setup, a larger enclosure is more stable, because it holds moisture and supports a bigger clean-up crew.
Orientation
Choose a tall enclosure. Front-opening doors make it easy to reach in without disturbing the gecko, and they reduce the chance of a gecko leaping out from the top.
Ventilation
Good ventilation prevents stagnant air and mold. Look for mesh at the top and ventilation at the front or sides. A fully sealed glass box can become too wet.
Material
Glass, PVC and sealed wood enclosures all work. Make sure the base is waterproof, since the drainage layer holds water.
Where to put it
Choose a quiet spot out of direct sunlight, away from drafts, radiators and cold windows. Temperature swings are more dangerous than a slightly imperfect average.
Shopping list
Gather everything before you start. This list assumes a standard tall enclosure.
The enclosure and basics
- A tall enclosure with ventilation.
- A thermometer and hygrometer, ideally digital with a probe.
- A spray bottle or misting system.
- A small, shallow water dish and a feeding ledge or dish.
The layers
- Drainage material, such as clay pebbles.
- A mesh barrier to separate the drainage from the soil.
- A chemical-free, moisture-holding substrate, such as a coco fiber, sphagnum and organic soil blend. Avoid fertilizers, pesticides and slow-release pellets.
- A large amount of dried, untreated leaf litter.
- Sphagnum moss and live moss for humidity.
Climbing and cover
- Branches, vines and cork bark, in a range of sizes.
- Plenty of hides, including some higher up.
- A fake or live plant background, if you like.
Plants
- Several live plants suited to humid, low-light conditions. See the plants section.
The clean-up crew
- A springtail culture and a pack of isopods, plus a backup culture in a separate container. See the clean-up crew section.
Lighting
- A light suited to live plants and, if you choose, a low-output UVB fixture.
Choosing and mixing the substrate
The substrate is the foundation of a bioactive enclosure, because the springtails, isopods and plant roots all live in it. A good mix holds moisture without turning to mud, drains well enough to avoid sourness and stays loose enough for roots and small animals to move through.
What a good mix does
- Holds moisture: materials such as coco fiber and sphagnum moss soak up water and release it slowly.
- Stays airy: bark chips and similar pieces keep the mix from compacting.
- Feeds plants: a little chemical-free organic soil gives plants nutrients to start with.
- Resists souring: good drainage and ventilation prevent stagnant, smelly patches.
Common ingredients
Many keepers blend several materials. Typical ingredients include coco fiber, sphagnum moss, chemical-free organic topsoil, orchid bark or similar chips, and sometimes a little horticultural charcoal. Exact recipes vary widely, and no single mix is the only right answer. Choose a reputable recipe and adjust it based on how your enclosure behaves.
What to avoid
- Soils with added fertilizers, pesticides, wetting agents or slow-release pellets.
- Cedar and pine shavings, which can release oils that harm reptiles and invertebrates.
- Sharp, loose materials that a gecko could swallow.
- Very fine dust, which can irritate eyes and lungs.
Depth
Aim for several inches of substrate, deeper at the back. A deep layer holds moisture better, supports plant roots and gives springtails and isopods room to live. Shallow substrate dries out and heats up faster.
Preparing it
Dampen the mix before it goes in, so it clumps without dripping. If the substrate is brand new and very dry, let it soak first, then wring out excess water.
Step-by-step build
Step 1: Clean and test the enclosure
Wipe the enclosure with plain water, and avoid harsh chemicals. Check that the doors close, the ventilation works and the base does not leak.
Step 2: Add the drainage layer
Spread a layer of clay pebbles across the bottom, about an inch or two deep. This catches excess water so it does not sit in the soil, which protects both plants and springtails.
Step 3: Add the barrier
Lay a mesh barrier over the drainage layer so the substrate does not wash into the water below. Cut it to fit, and make sure it reaches the walls.
Step 4: Add the substrate
Pour in several inches of substrate. Dampen it before you add it, so it clumps when squeezed but does not drip. Slope it a little, higher at the back, for a natural look and varied moisture.
Step 5: Add structure
Position branches, vines and cork bark before you plant, so you can see how the gecko will move through the enclosure. Make sure everything is stable and nothing can fall.
Step 6: Plant
Place your live plants, pressing roots into the soil. Rinse plants thoroughly first to remove any pesticides or fertilizers. Put taller plants at the back and low growers at the front.
Step 7: Add leaf litter and moss
Cover the soil with a thick layer of dried leaves, and tuck moss into corners and around plants. This is the main habitat for springtails and isopods.
Step 8: Add the clean-up crew
Add your springtails and isopods, using the methods in the next section. Do this early, so the colony has weeks to grow.
Step 9: Set the climate
Turn on the light and any heat you need, mist the enclosure, and check the temperature and humidity. Adjust until they sit in your target range. Do this for several days before adding the gecko.
Step 10: Wait
Let the enclosure settle. Mist in the evening, watch the plants and look for springtails moving through the leaf litter. For more depth, see our guide to setting up a bioactive terrarium.
The best clean-up crew for a crested gecko
A balanced crew uses both springtails and isopods, because they do different jobs. Springtails graze on mold and microscopic waste, and isopods break down larger debris. Our guide to springtails vs isopods explains the difference in more detail.
Springtails
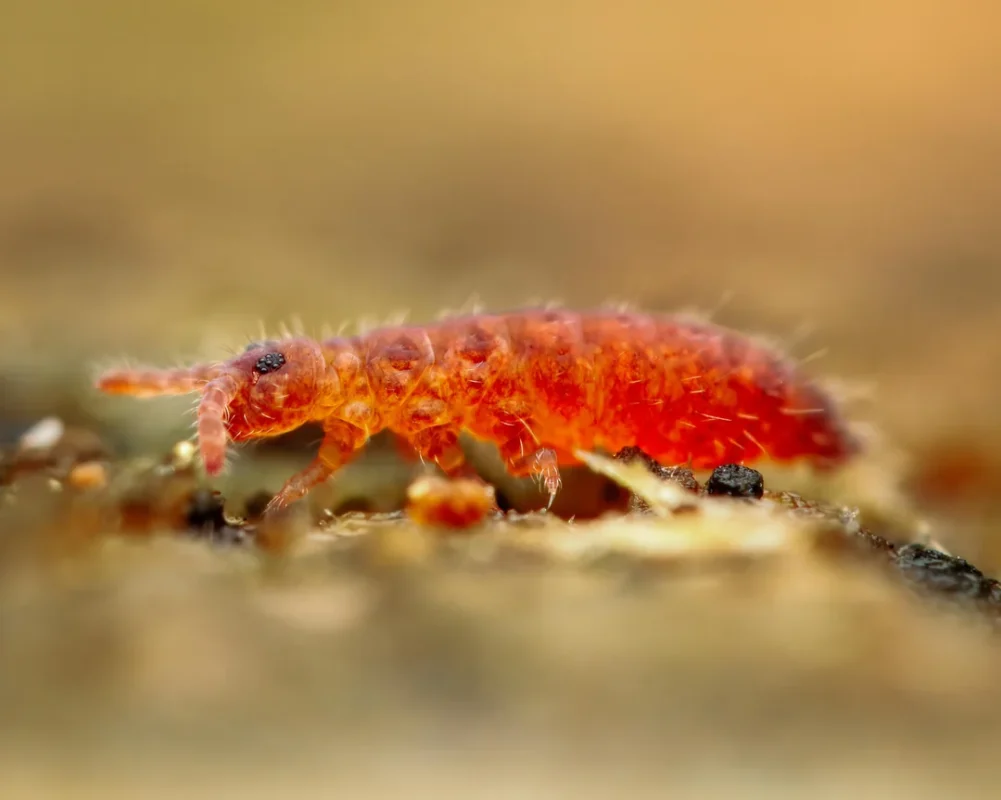
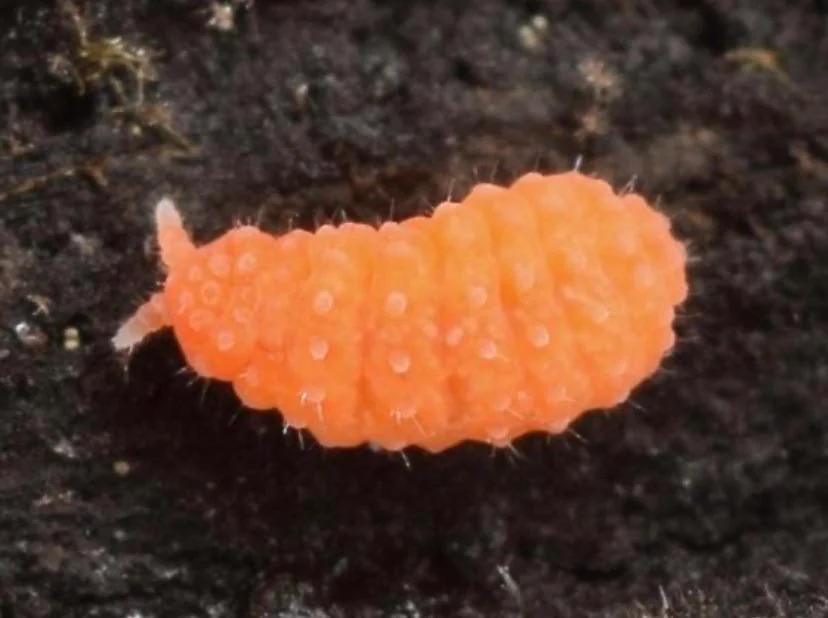
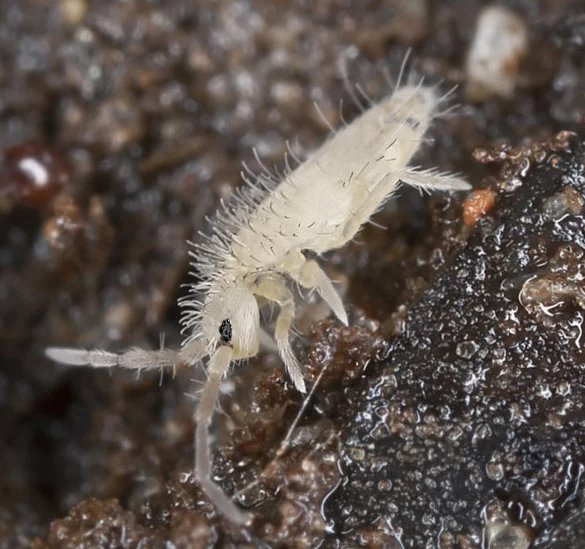
Choose a tropical species that suits a warm, humid enclosure. Tropical White springtails are the usual pick, because they are prolific and easy to establish. Avoid temperate species such as Folsomia candida in a warm enclosure. Our guide to temperate vs tropical springtails explains why.

Isopods
Crested gecko enclosures are warm and humid with a damp lower layer, which suits isopods that like moisture.
- Powder isopods: small, prolific and tolerant of damp conditions. A very popular choice.
- Dairy Cow isopods: hardy, active and easy. See Dairy Cow isopods.
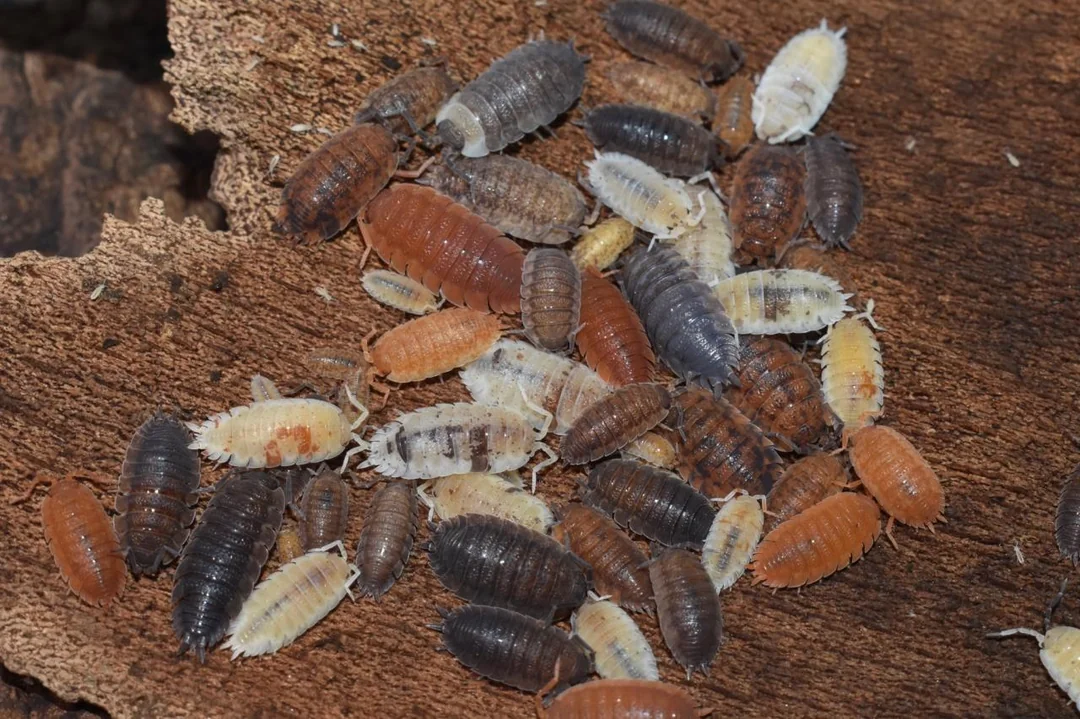

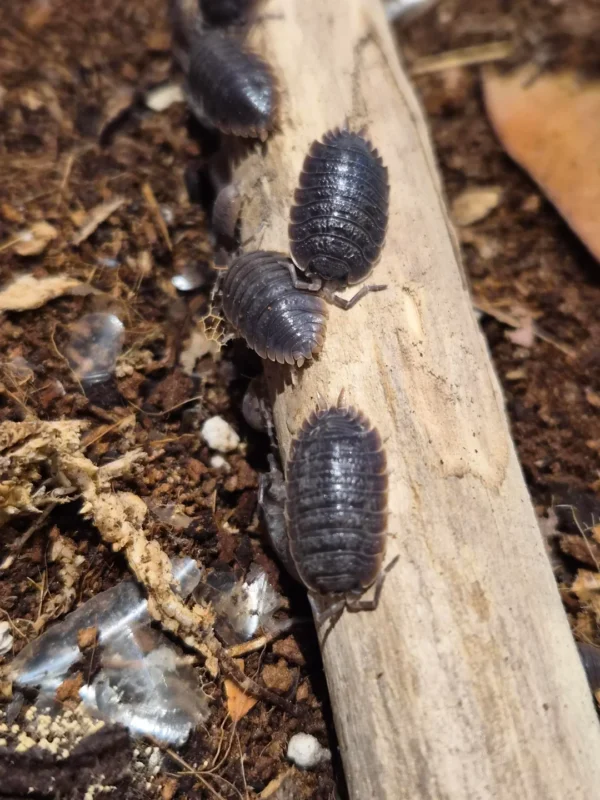

- Other Porcellio: Dalmatian and Giant Canyon work too in larger enclosures.
For help choosing, read our guide to the best isopods for beginners, or browse all our isopods.
A caution about isopods and geckos
Some geckos will eat isopods, especially small ones, and others ignore them. A deep layer of leaf litter and plenty of hides protect the colony. Start with a good number of animals, and add more if the population shrinks.
How to add them
- Let them rest. When your order arrives, open it immediately and let the containers sit at room temperature for 2 to 4 hours. Isopods and springtails often look still after shipping.
- Add springtails. Place the culture container inside the enclosure near damp leaf litter, remove the lid and tap gently. They will spread on their own.
- Add isopods. Place them near a hide or under leaf litter, not in a pile.
- Feed lightly. A pinch of yeast or a fish flake for the springtails, and a little vegetable or dried leaf for the isopods, helps the colony settle. Do not overfeed.
- Keep a backup. Keep a second springtail culture in a separate container. If the enclosure colony drops, you can restock.
How many do you need? Our sizing guide gives numbers by enclosure size. As a rule, buy more than you think you need.
Lighting, heat and cooling in more detail
Getting the climate right is the single most important part of crested gecko care, and it matters even more in a planted enclosure, where plants, animals and clean-up crew all depend on it.
Day and night cycle
Crested geckos are most active at night. A steady cycle of roughly twelve hours of light and twelve of dark suits both the gecko and the plants. Put lights on a timer, so the schedule is the same every day.
Lighting for plants
Live plants need light to grow. Choose a fixture that gives enough light for the species you have, and place it so that it does not overheat the enclosure. LED fixtures run cooler than many older options.
UVB
Many keepers now offer low-output UVB, as it is increasingly recommended for crested geckos. If you use it, follow the manufacturer’s advice on distance, and make sure the gecko has shaded areas to retreat to. Ask your vet or breeder what suits your animal and your setup.
Heat
Most homes do not need extra heat for crested geckos, as room temperature is often enough. If you do need heat, use a thermostat to control it, and avoid hot spots. Never use heat rocks. Always measure the temperature at the gecko’s level, not only near the heat source.
Cooling in summer
Heat is a bigger risk than cold for this species. In summer, keep the enclosure out of direct sun, increase ventilation and consider a fan or air conditioning in the room. If the temperature climbs into the high 70s and low 80s °F for long periods, act quickly. Heat also dries springtails and plants, so keep the substrate damp.
Power cuts and travel
Have a plan for hot and cold spells and power failures, especially if you rely on a thermostat. A simple backup, such as a way to cool or warm the room, can prevent a bad night.
Plants for a crested gecko enclosure
Live plants make the enclosure healthier and more attractive. Because geckos climb on and sometimes chew plants, choose species that are widely used in crested gecko setups, and check each one against a reptile-safe plant list before you buy. Do not rely on a single source.
Commonly used plants
- Pothos: tough and fast growing. It is widely used, but research its safety before use, and check whether your gecko chews it.
- Bromeliads: ideal for holding water and for providing climbing spots.
- Ferns: suit humid, shaded areas.
- Mosses: great for ground cover and humidity.
- Ficus and other climbers: provide structure and leaves to rest on.
Planting tips
- Rinse every plant thoroughly to remove pesticides and fertilizers.
- Quarantine new plants for a week or two when you can.
- Give plants time to root before the gecko arrives.
- Use enough plants to provide cover, but leave open branches for climbing.
Springtails and isopods feed the plants by turning waste into nutrients, so a bioactive enclosure often needs little or no extra fertilizer.
Feeding the gecko and the crew together
One of the best things about a bioactive enclosure is how the animals share the work. The gecko eats its diet, and the clean-up crew handles the leftovers.
The gecko’s food
Mix the gecko’s diet with water as directed, and offer it in a shallow dish placed higher up, so it stays cleaner and is easy to reach. Offer it in the evening, when the gecko becomes active.
What happens to leftovers
Leftover paste is sugary and wet, so it molds and spoils fast in a humid enclosure. Remove old food after about a day. Springtails and isopods will clear up crumbs that fall to the ground, and springtails will graze on early mold, but they are no substitute for removing old food yourself.
Feeding the clean-up crew
In an established enclosure, springtails and isopods feed on mold, leaf litter, droppings and decaying matter. If the crew looks thin, add a pinch of yeast or fish flakes for the springtails, and a small piece of vegetable and a bit of protein for the isopods. Do not overfeed. Calcium is important for isopods, so add a piece of cuttlebone.
Watch the balance
If the gecko is eating well and the crew is thriving, the system is working. If mold keeps appearing, you may be leaving too much food, keeping the enclosure too wet or running too small a crew.
Timeline: cycling before the gecko arrives
New enclosures need time. Keepers often call this “cycling” or “letting the enclosure establish”. The aim is to give plants time to root and the clean-up crew time to multiply. A practical target is three to six weeks before the gecko moves in.
| When | What to do |
|---|---|
| Day 0 | Build the layers, add plants and decor, and add the springtails and isopods. Set heat and humidity. |
| Week 1 | Mist in the evening, check the temperature and humidity, and leave the crew alone to settle. Watch for mold. A little is normal. |
| Week 2 | You should see springtails moving across the leaf litter. Feed lightly and keep the surface damp but not wet. |
| Weeks 3 to 4 | The crew should be visibly growing, with juveniles appearing. Prune plants and adjust the climate if needed. |
| Weeks 5 to 6 | If the population is strong, plants are rooting and the climate is steady, the enclosure is ready. |
If the colony is thin, wait longer. A few extra weeks protects both the gecko and your plants.
Bringing your gecko home
Be ready before it arrives
Have the enclosure running, the climate in range, food and a water dish ready. Make sure you have a plan for a vet check, and a reptile vet nearby.
The first days
Place the gecko in the enclosure gently and leave it alone. Cover part of the glass if it seems stressed, and avoid handling for the first few days. A new gecko often hides for a while, which is normal.
Feeding
Offer a small amount of crested gecko diet in the evening. Remove it after about a day, so it does not spoil. Your isopods will help clear up anything left.
Handling
Wait until the gecko is eating and settled before you start handling it, and begin gently with short sessions. Wash your hands before and after.
If the gecko arrives as a gift
Do not give a live reptile as a surprise. The recipient needs the enclosure ready and a plan. Many keepers give the gecko in a gift card or promise, then bring it home once everything is prepared. A bioactive clean-up crew is a gift that can be given earlier, because the crew needs weeks to establish. See our gift guide and gift sets.
Handling and settling your gecko
Once your enclosure is running and the gecko is settled, you can start to handle it. Patience is the key.
- Wait. Give the gecko at least a week or two to settle and eat well before you handle it.
- Start short. Begin with a few minutes at a time, in the evening, with calm movements.
- Support the body. Let the gecko walk from hand to hand. Never grab it, and never pull the tail. Crested geckos can drop their tails, and they do not regrow them.
- Keep sessions calm. Handle over a soft surface, near the ground, in case it leaps.
- Wash your hands. Before and after handling, to protect both of you.
- Watch for stress. A gecko that gapes, leaps or flicks its tail wants to be left alone.
A bioactive enclosure helps here, because there is less disruption from cleaning. You rarely need to take everything out.
Seasonal care: winter and summer
Winter
- Watch the temperature. If your home gets cold at night, check that the enclosure does not drop too far. Use a thermostat-controlled heat source if needed.
- Humidity may drop. Heated indoor air is dry. Mist a little more, and use moss and plants to hold moisture.
- Order live animals carefully. If you are ordering a crew in winter, we add heat packs and hold orders when it is too cold. Read our guide to winter shipping for live isopods.
- Be ready to bring a package in. Make sure someone can take in your delivery promptly.
Summer
- Keep it cool. Heat is the bigger danger. Keep the enclosure out of the sun and improve ventilation.
- Check humidity. High temperatures dry the substrate quickly.
- Hot-weather shipping. We add cold packs and hold orders when it is too hot. See our weather policy.
Weekly routine
A bioactive enclosure is low-maintenance, but not no-maintenance. Here is a simple routine.
Every evening
- Mist the enclosure lightly, so the gecko can drink and humidity rises.
- Offer fresh food and remove the old food.
- Check the water dish.
Every few days
- Spot-clean visible droppings.
- Check the temperature and humidity.
Every week
- Look at the substrate for signs of mold or sourness.
- Check that the springtails and isopods are active. Add a pinch of food if they look thin.
- Wipe the glass and rinse the water dish.
Every month
- Top up the leaf litter and moss.
- Prune plants and replace any that are failing.
- Check branches and decor for stability.
Every few months
- Refresh part of the substrate if it looks exhausted.
- Add more springtails or isopods if the crew is thin.
For feeding and care of the springtails themselves, see our springtail culture care guide.
Troubleshooting
There is mold on the substrate or decor
A little mold in a new, humid enclosure is normal, and springtails eat it. A lot of mold means too much moisture, too little ventilation or too few springtails. Remove the source, improve airflow and add more springtails.
I see fungus gnats
Gnats mean the substrate is too wet and the clean-up crew is too small. Let the surface dry slightly between mists, and add more springtails. See our guide to fungus gnats in terrariums.
The springtails have disappeared
They may be hiding, or the substrate may be too dry. Check under leaf litter, dampen the substrate and add a pinch of food. If the colony is gone, restock from your backup culture. Our guide to a culture that isn’t reproducing explains common causes.
The isopods are dying
The usual causes are substrate that is too dry or too wet, too little calcium and cold temperatures. Make sure there is a moisture gradient, add a calcium source such as cuttlebone and keep conditions steady.
The enclosure smells sour
A sour smell means stagnant, waterlogged substrate. Improve ventilation, remove any wet, compacted areas and let the surface dry between mists.
The humidity is too low
Mist more thoroughly, add moss and plants, and use a deeper substrate. In very dry homes, a larger enclosure holds moisture better.
The humidity is too high
Improve ventilation, mist less and allow the enclosure to dry between mists.
The whole enclosure has gone wrong
If mold and pests have taken over, see our guide to a crashing bioactive terrarium. If your gecko seems unwell, contact a reptile vet straight away.
Common mistakes
- Adding the gecko too soon. The crew and plants need weeks to establish.
- Keeping everything too wet. Constant soaking causes mold and bacteria. Let it dry between mists.
- Keeping it too hot. Crested geckos are sensitive to heat. Check the temperature.
- Skipping the drainage layer. Water collects in the soil and drowns the crew.
- Using the wrong substrate. Avoid fertilizers, pesticides, cedar and pine.
- Using the wrong springtails. Temperate species struggle in a warm enclosure.
- Too small a crew. A small crew gets overwhelmed by mold.
- No backup culture. If the enclosure colony crashes, you have nothing to restock.
- Leaving food in too long. It spoils and invites mold.
- Choosing unsafe plants. Check every plant before use.
- Rushing the build. A calm, planned setup beats a hurried one.
Budget and gift ideas
A bioactive setup costs more up front than a basic one, but it can save time and money over the long run. The main costs are the enclosure, the substrate and plants, lighting and the clean-up crew. The crew itself is one of the cheapest parts. Starter cultures from our shop begin at around $15, as of November 2026, and a gift set bundles several species together.
If you are buying for a new gecko owner
- A beginner clean-up crew set gives a complete crew in one box.
- A small pack of Dairy Cow isopods plus Tropical White springtails is a simple, low-cost combination.
- Cork bark, leaf litter, a hygrometer and live plants make good extras.
Remember the deadline
We ship live animals Monday to Wednesday, and we recommend ordering by Wednesday, December 16 for Christmas delivery. In cold weather, we add heat packs and hold orders when it is too cold, as explained in our winter shipping guide. See our Shipping Policy for details.
Frequently asked questions
Can crested geckos live in a bioactive enclosure?
Yes. A bioactive enclosure suits crested geckos well, as long as the temperature, humidity and plants are suitable and the enclosure has time to establish before the gecko moves in.
What size enclosure does a crested gecko need?
A commonly recommended minimum for a single adult is about 18 by 18 by 24 inches. A bigger enclosure is better and is more stable in a bioactive setup.
What clean-up crew is best for a crested gecko?
A combination of tropical springtails, such as Tropical White, and humidity-loving isopods, such as powder isopods or Dairy Cow, works well.
How long before the gecko can go in?
Three to six weeks is a good target, so the crew and plants can establish. Wait longer if the population looks thin.
Will my gecko eat the isopods and springtails?
Some geckos may eat them, and others ignore them. Provide deep leaf litter and hides, start with a good number and keep a backup culture.
What temperature do crested geckos need?
Roughly 72 to 78°F (22 to 26°C) is a common target. Avoid sustained heat above the low 80s °F. Check with a reptile vet or reputable breeder.
How humid should the enclosure be?
Roughly 60 to 80 percent, with a heavier mist in the evening and time to dry during the day.
Do I need UVB?
Many keepers provide low-output UVB, which is increasingly recommended. Ask your vet or breeder what suits your setup.
How often should I clean the enclosure?
You will still spot-clean droppings and old food, but the clean-up crew handles the rest. Plan to refresh part of the substrate every few months.
What if my enclosure grows mold?
Some mold is normal in a new enclosure, and springtails eat it. If it spreads, reduce moisture, improve ventilation and add more springtails.
Can I give a crested gecko as a gift?
We suggest giving the clean-up crew and supplies first, and bringing the gecko home once the enclosure is ready. A live reptile should not be a surprise.
Where can I buy springtails and isopods for my gecko?
You can buy them from us. Browse our tropical springtails and isopods, or choose a gift set.
The bottom line
A bioactive crested gecko enclosure is one of the most rewarding setups you can build. Choose a tall enclosure, build the layers carefully, use safe plants and a crew of tropical springtails and humidity-loving isopods, and give the enclosure three to six weeks to establish before the gecko moves in. Keep the temperature moderate, mist in the evening and let the enclosure dry between mists, and you will have a healthy little rainforest for years.
Questions? Read our FAQ, see How It Works, or contact us.
Shop gift sets | Shop tropical springtails | Shop isopods
