
Bioactive Setup
How to Start and Maintain a Slime Mold Culture Guide 2026

Jun
Table of Contents
How to Start and Maintain a Slime Mold Culture Guide — Complete For Beginners
Slime mold is one of those things that sounds complicated until you actually try it. In reality it’s one of the easiest cultures you can maintain — and once you have a thriving colony, you’ll find yourself with more than you know what to do with. This guide covers everything from choosing your container to keeping your culture alive long term.
What Is Slime Mold and Why Do Springtail Keepers Use It?
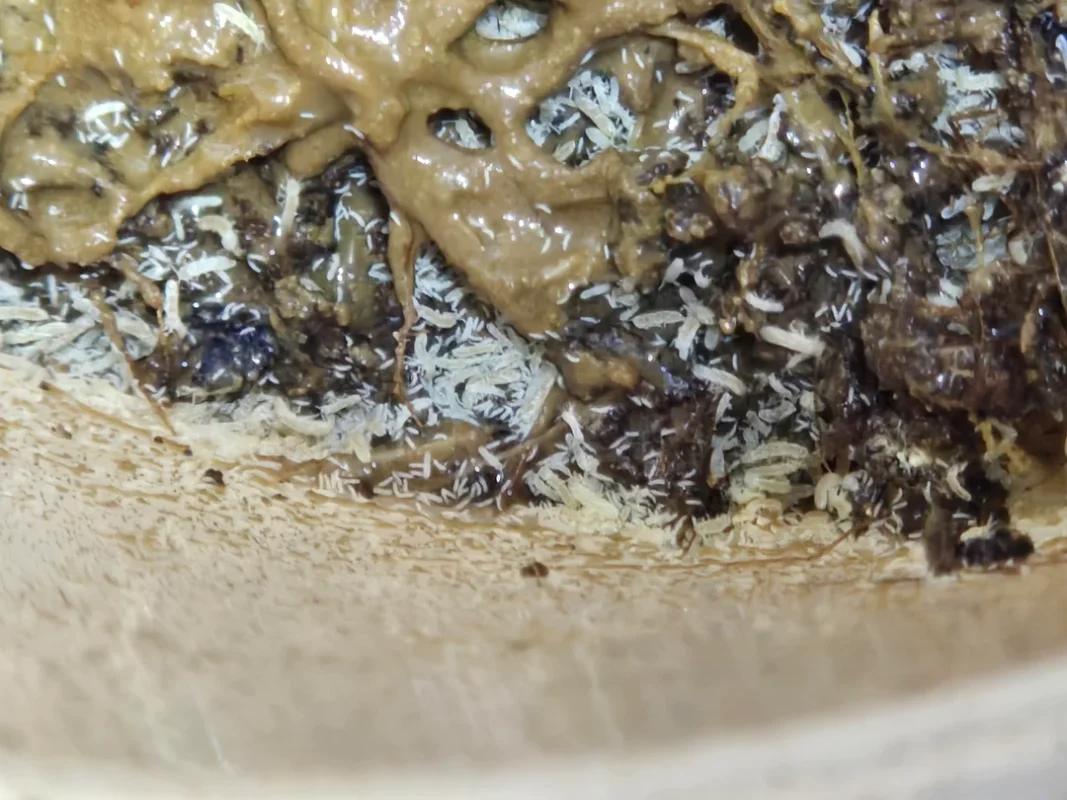
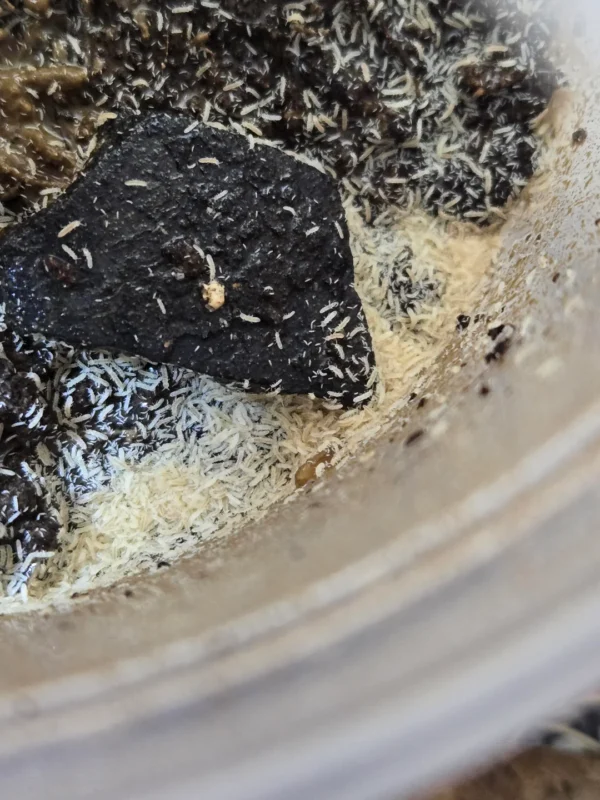
Slime mold (Physarum polycephalum and related species) is not actually a fungus nor a plant — it’s a fascinating organism that sits in its own biological category. In the context of bioactive vivariums and springtail cultures, slime mold serves as a rich supplemental food source. Springtails graze on it actively, and a healthy slime mold culture produces a near-constant supply.
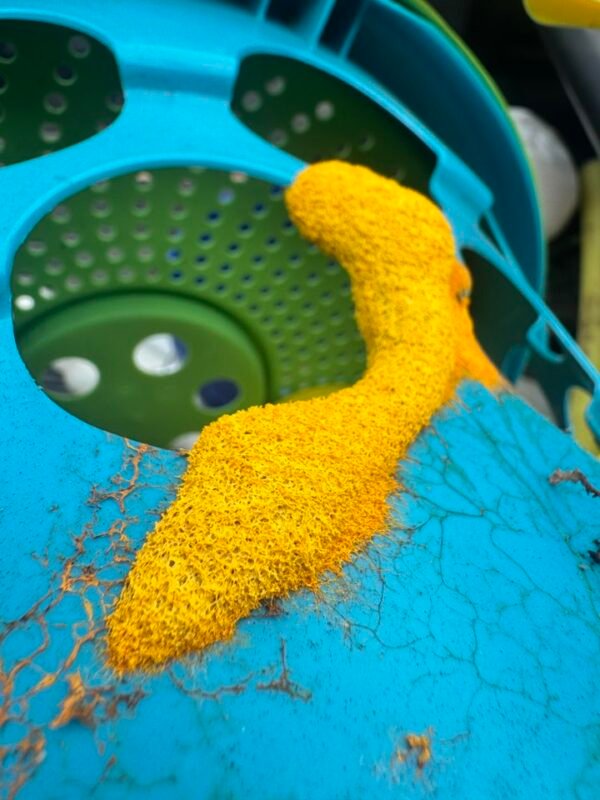
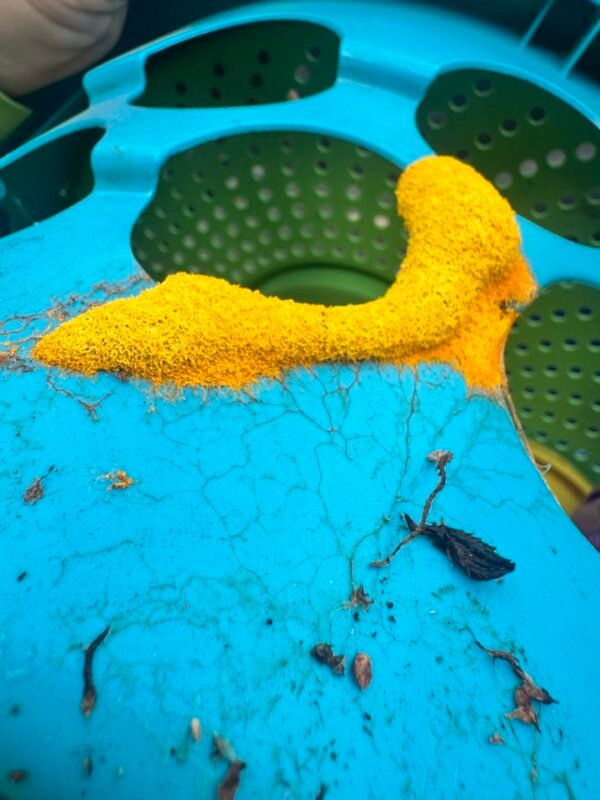
Many keepers stumble into slime mold accidentally — finding patches of it under water bowls in reptile enclosures or in the corners of established bioactive tanks. Ball python keepers in particular often notice it thriving in the humid corners of their setups. If you spot it in an existing tank, transferring a small amount into a dedicated container is the easiest way to start your first culture.
SLime mold culture guide
Slime molds are not fungi, and many are not, in fact, slimy. Slime molds are a group of organisms seperate to any of the kingdoms of life you’ve probably heard much about. They are also known as myxomycetes.
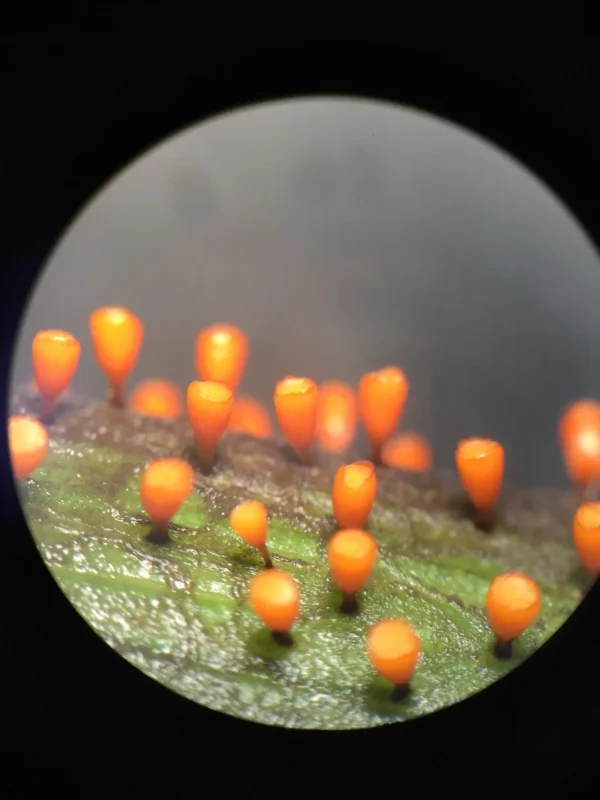
One of the most interesting things about slime molds is their unique life cycle. Fruiting bodies produce spores, from which emerge several amoebae (single celled organisms with distinct nuclei). These will live for some time as single cells, feeding on other microorganisms such as bacteria and multiplying through binary fission. Eventually, when conditions are favourable, two compatible amoebae will fuse, forming a diploid zygote. The zygote feeds and grows larger, becoming what is known as a plasmodium. After feeding for some time, this plasmodium will transform into fruiting bodies again.
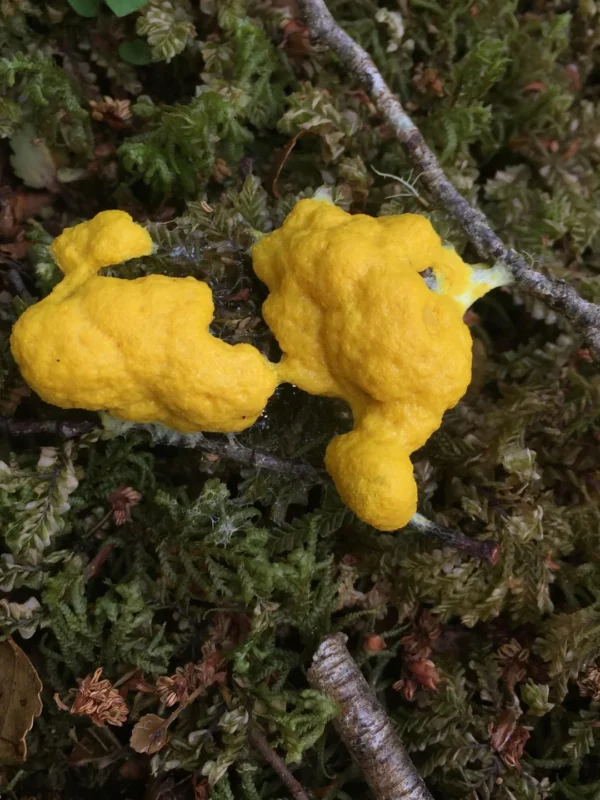
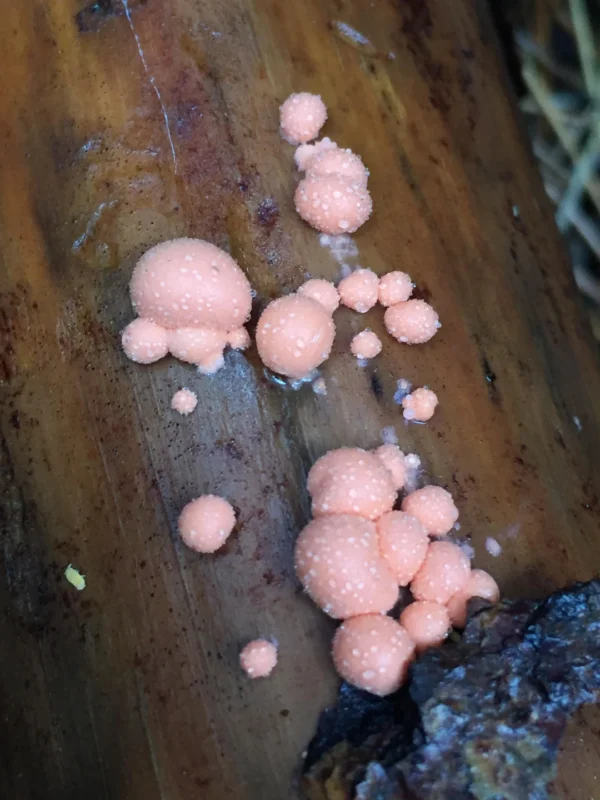
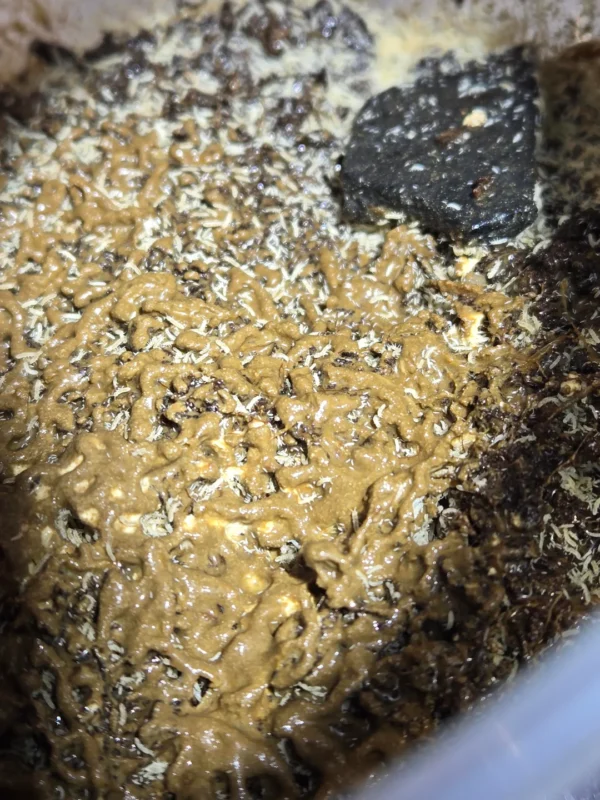
The stages of this life cycle that you are likely to see are the plasmodia and the fruiting bodies. The most common type of plasmodia generally looks something like this:
Choosing Your Culture Container
The container you use matters less than you might think — what matters more is that it holds moisture, allows some gas exchange, and gives the colony enough space to grow without crashing too quickly.
Best container options
- Deli cups — popular for small starter cultures, widely available, easy to stack
- Tupperware or food containers — excellent for mid-size cultures, airtight lids hold moisture well
- Plastic shoeboxes — ideal for larger colonies, more surface area means less frequent maintenance
- Buckets — great for high-volume producers who sell or trade cultures regularly
As a general rule: the bigger the container, the less work it requires. A larger volume of substrate retains moisture longer and buffers against the sudden crashes that smaller cultures are prone to.
Ventilation — holes or no holes?
This is a debated topic. Some keepers skip ventilation entirely to retain maximum moisture. However gases can build up inside a sealed container and kill the colony without warning. The safer approach is to poke several small holes in the lid using a thumbtack or pin — enough for gas exchange without drying the substrate out too quickly.
Choosing Your Substrate — Charcoal, Sphagnum Moss, or Clay?
Charcoal
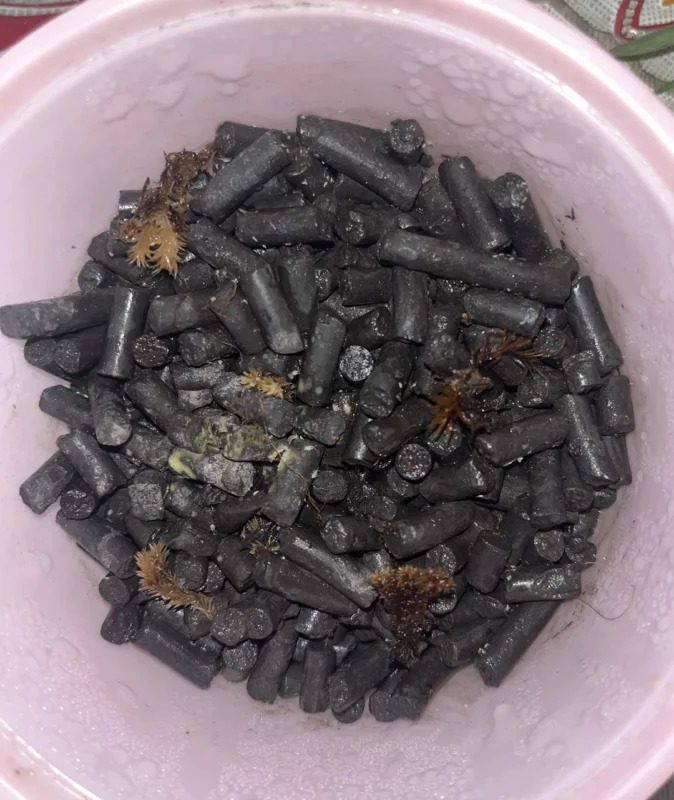
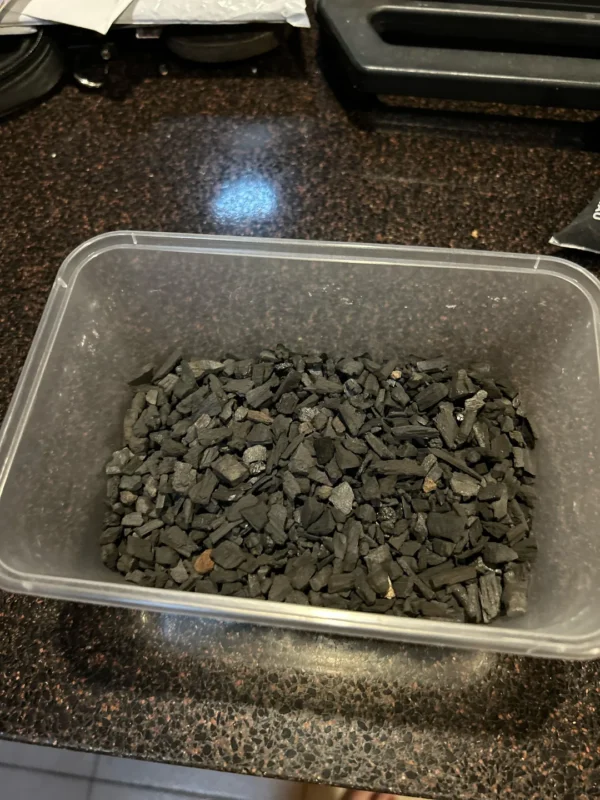
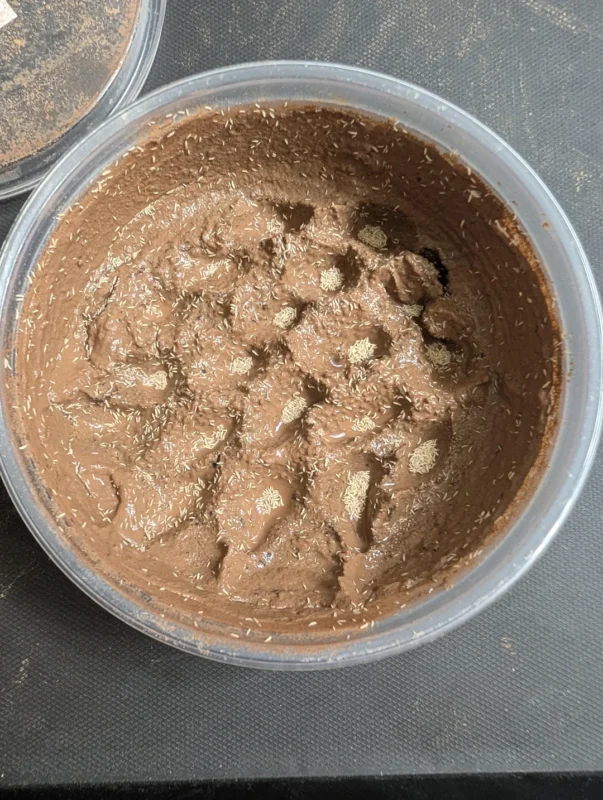
Activated or horticultural charcoal is the most widely used substrate for slime mold cultures. It holds moisture well, provides excellent surface area for the colony to spread across, and is easy to source.
One critical warning: do not use BBQ briquettes or chemically treated charcoal. Most charcoal sold for grilling contains additives designed to make it easier to light — these chemicals are toxic to your culture and will kill it. What you want is one of the following:
- Horticultural charcoal from a garden centre or plant shop — already broken into small pieces, no additives, easy to work with
- Lump BBQ charcoal with no additions — harder to find outside of grilling season but cheaper in bulk. Check the ingredients carefully. No briquettes, no lighter fluid, no additives of any kind
- Charcoal sold by specialist vivarium suppliers such as Josh’s Frogs — pre-sized, clean, and ready to use
If your charcoal pieces are too large, break them down. Place the charcoal in a heavy-duty bag and smash it with a hammer. It’s messy but effective. Smaller pieces mean more surface area, which means more space for your colony to colonise and more food for your springtails.
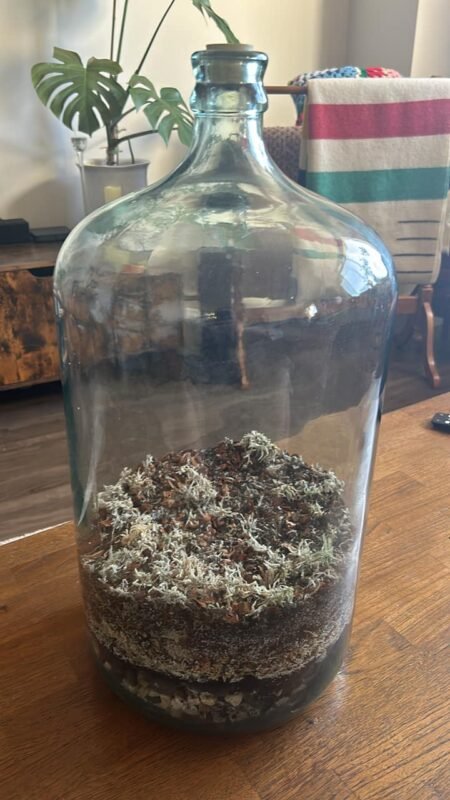
Adding sphagnum moss as a base layer
A simple upgrade that makes a real difference: before adding your charcoal, lay down a base layer of dried sphagnum moss to cover the bottom of the container. The moss increases surface area for slime mold growth, retains moisture during periods when you forget to water the culture, and creates a more forgiving microenvironment overall. It’s not essential, but it adds a buffer that makes the culture more resilient.
Clay as an alternative
Some keepers culture slime mold on clay rather than charcoal. The main advantage is shipping — clay-based cultures are more compact and less prone to being crushed in transit. If you plan to sell or trade your cultures, clay is worth considering. For home use where shipping isn’t a factor, charcoal or charcoal over sphagnum moss tends to outperform clay for long-term colony health.
Bioactive tanks
If you keep a bioactive vivarium, you may not need a dedicated culture at all. Slime mold establishes naturally in many bioactive setups, particularly in humid corners and under water bowls. Ball pythons, dart frogs, and other high-humidity reptile enclosures are especially prone to producing it. If you have an established tank with a healthy slime mold presence, simply shake or scrape a portion into a container whenever you need a supply.
Setting Up the Culture
Once your container and substrate are ready:
- Fill the container as full as possible with your charcoal substrate
- Add dechlorinated water until the substrate is roughly halfway submerged
- Maintain that water level throughout the culture’s life — this is the single most important maintenance task
- Introduce your slime mold — either from an existing culture, a purchased starter, or a transfer from a bioactive tank
- Place the lid on with ventilation holes and store in a temperature-controlled location out of direct sunlight
A note on sourcing slime mold
If you order slime mold cultures by mail, be aware that they don’t always ship well. The colony can get crushed or damaged in transit. Even if what arrives looks sparse or partially dead, transfer it into your prepared culture anyway — eggs and dormant material survive better than visible adults, and a colony can establish from very little. Keep watering the original packaging material as well for a week or two, as a backup. Having two cultures running simultaneously is always a good idea.
Feeding and Ongoing Maintenance
Slime mold culture maintenance is minimal once established. The two things that matter most are water levels and feeding.
Water
Keep the water level at the halfway mark on your charcoal substrate consistently. Top it up with dechlorinated water — tap water treated with a dechlorinator, or water that has been left out for 24 hours to off-gas chlorine. Never let the substrate dry out completely.
Feeding
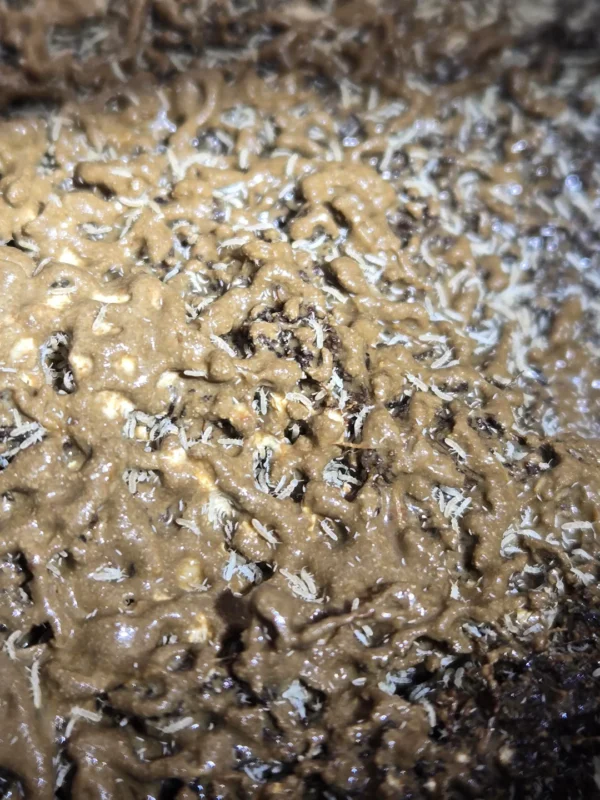
The most reliable food source for springtail cultures containing slime mold is nutritional yeast. Sprinkle a small amount across the surface of the substrate every few days. Be conservative — nutritional yeast off-gasses as it breaks down, and overloading a sealed container can build up enough gas to crash the colony. A light dusting is all you need.
Other food sources that work well include:
- Dried or slightly moistened oats
- Rice grains
- Small amounts of dried organic matter
- The dried food residue from gecko or reptile feeding cups — particularly effective and a good way to recycle waste
Temperature
Keep your culture in a temperature-stable location. Avoid areas that get too hot in summer or too cold in winter. Room temperature — roughly 65–75°F (18–24°C) — is ideal for most cultures. Extreme heat will crash a colony quickly.
Why Cultures Crash — and How to Prevent It
Even well-maintained cultures crash occasionally. The colony will swell in numbers, then suddenly collapse for no obvious reason. This is normal behaviour and not necessarily a sign of failure — it’s part of the natural boom-and-bust cycle of springtail and slime mold populations.
The best protection against crashes is redundancy:
- Always run at least two cultures simultaneously
- Start new cultures regularly by dividing an established colony into a fresh container with new substrate
- Never rely on a single culture as your only source
If a culture crashes, don’t discard it immediately. Keep watering it for a week or two — dormant eggs often survive and can re-establish the colony without any additional input.
Slime Mold and Springtails — The Natural Pairing
Slime mold and springtails are a natural combination. In the wild, springtails graze on slime mold as part of their natural diet, and in culture they do the same. A container with both running together creates a self-sustaining micro-ecosystem: the slime mold grows on the substrate and provides food, the springtails graze and reproduce, and the system ticks over with minimal input from you.
If you’re already keeping springtail cultures, adding slime mold to an existing container is as simple as introducing a small amount to the surface. Within a week you’ll typically see it spreading across the charcoal.
Quick Reference — Slime Mold Culture Cheat Sheet
| Factor | Recommendation |
|---|---|
| Container | Deli cup, Tupperware, shoebox, or bucket |
| Substrate | Horticultural charcoal over sphagnum moss base |
| Water | Halfway up substrate, dechlorinated, topped up regularly |
| Ventilation | Small holes in lid for gas exchange |
| Food | Nutritional yeast (light dusting), oats, dried organic matter |
| Temperature | 65–75°F (18–24°C) |
| Backup | Always run 2+ cultures simultaneously |